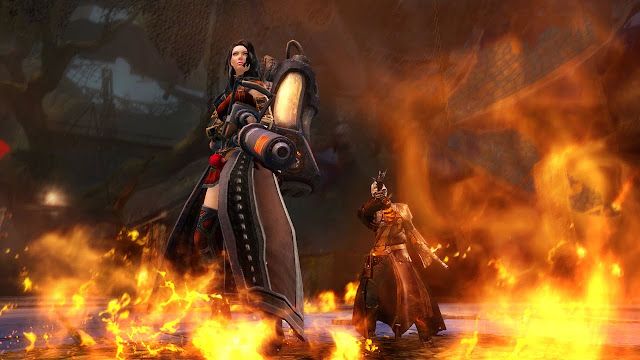

Sabetha the Saboteur, usually shortened to Sabetha, is a boss encounter and the fourth and final encounter of the Spirit Vale raid wing.
This encounter has a pre-event. See its page here for a detailed rundown
Required Masteries
Glider Basics is required for the players who are in charge of cannons. It can also be helpful if the squad fails to CC “Knuckles”.
Explosive Launch will benefit cannon players as well, as it will prevent the launchpad from dealing damage to them when they’re hit with the Sapper Bomb.
Utilities & Special Roles
Bringing some stability or pulls can be helpful to deal with adds and prevent them from pushing players with their kicks. Some CC is required for “Knuckles”. Piercing projectiles can be useful for taking down Flame Turrets near the end of the fight.
Cannons
Depending on your strategy, 1-2 players will be in charge of dealing with the cannons mechanic. This does not require a special build, but is best performed by DPS players. A single player cannot do two cannons in a row, so you will need two if you’re doing the common strategy.
Throughout the battle, the four cannons will periodically activate. If you have two cannon players, one is in charge of the first and third cannons (1/3) and one is in charge of the second and fourth (2/4). Note that the spawn pattern of cannons is eight parts long, meaning each player won’t necessarily be going to the same cannons each time it’s their turn. 1/3 will go south, north, south, and finally west before repeating that pattern; 2/4 will go west, east, north, and finally east.
If you only assign one cannon player, they may be in charge of one or two cannons; the other two/three get ignored. This strategy is more difficult and not recommended for new groups; see the strategies section below for more details.
Cannons spawn on a consistent timer and in a consistent pattern; see the mechanics section below for more details. When a player’s assigned cannon spawns, they will move to the respective launchpad to get launched up with a Sapper Bomb. They then kill the cannon and glide back down to the group.
The hitbox of Sabetha’s flamewall extends upwards and can hit players who glide above it. Pay careful attention to what’s happening below before you jump down.
For new groups, it can be helpful to assign specific players as backup cannons who will take over the mechanic if the players in charge of it die. Having someone assigned to this beforehand makes the transition much smoother than if you need to volunteer someone mid-fight.
Flak Kiter
One player, usually a healer and/or ranged build, will serve as a flak kiter. They must be the furthest player from Sabetha so that she targets them with the flak mechanic instead of placing the AoEs on the group.
Depending on your strategy and the player’s build, the flak kiter may either stand directly behind the group or spend most of their time on the west side of the arena. Flak Shot is the third skill in Sabetha’s auto-attack chain; as such, after she uses it, the flak kiter has a couple seconds where they can return to the stack to deal additional damage or apply boons or healing to their subsquad.
Sapper Kiter
This is an optional role. It can be done by the same player who is the flak kiter. The sapper kiter attempts to always be the player targeted with Sapper Bombs.
Sapper Bombs are granted by Bandit Sapper adds when they spawn to the westmost player within range of the mob. Standing on the west side of the arena will accomplish this for most sapper spawns, but some sappers will appear too far away to target you.

5 seconds after each cannon spawns, the sapper will spawn on the opposite side. Referencing the markers shown to the right, follow this pattern of positions to always be in range of the sapper, changing positions after each spawn:
- West of heart, between it and circle.
- West of square. If the squad isn’t standing here, you can stand directly between it and Sabetha. If they are, it will be difficult to bait both the bomb and flak; stand between square and arrow.
- West of arrow, between it and circle.
- Near circle.
- West of heart, between it and circle; the same position as step 1.
- West of arrow, between it and circle; the same position as step 3.
- West of square; the same position as step 2.
- Near circle; the same position as step 4.
Core Mechanics
Unstable Platform
The encounter takes place on a hanging platform. This platform has its own HP bar, displayed in the top corner above Sabetha’s. If it is destroyed, it will collapse from beneath the squad’s feet and cause a wipe.
Active cannons will continuously deal small amounts of damage to the platform until they are destroyed. Heavy Bombs deal 20% of the platform’s HP if they explode without a player kicking them.
Technical Details:
These details are not necessary to understand the mechanic or get a clear; they are for those who want a deeper, more technical understanding of the encounter.
The platform has 14,940 HP. Cannon AoEs deal 29 damage to it, and cannons fire every ~1.6 seconds. As such, the DPS of an active cannon is ~18.12, or ~0.12% of the platform’s HP per second; with all four cannons active, their DPS is ~72.5, or ~0.5% of the platform’s HP per second. Note that these numbers do not take volleys into consideration.
Cannons, Launchpads, & Sapper Bombs

Four small platforms surround the main platform in the cardinal directions. Cannons will spawn on these platforms every 30 seconds to shoot down at the platform, damaging both it and any players they hit.
After the encounter begins, a cannon will spawn every 30 seconds. They always spawn in a consistent, looping pattern: south, west, north, east, south, north, west, and finally east. Note that the first four spawns progress clockwise, starting at the south, but the next four do not.
5 seconds after each cannon spawns, a Bandit Sapper will spawn near the opposite side of the arena. Additionally, every second time a cannon spawns, two bandit mobs will spawn on two random sides of the arena. The sapper will apply a Sapper Bomb to the westernmost player on the platform within its range. The targeted player gains a SAK and a small green AoE around their feet. The AoE has no effect and is purely a visual indicator.
The Sapper Bomb SAK is a ground-targeted AoE. Located at the edge of the platform in each direction is a blue launchpad. If a player is hit with the AoE of a thrown Sapper Bomb while standing on the launchpad, they will be launched up to the respective platform. If the cannon there is active, they can destroy it before gliding back down.
Players launched on a launchpad during this encounter gain the Shell-Shocked effect for 50 seconds, which prevents them from being launched again. This is why the general strategy requires two players to handle cannons, as they spawn every 30 seconds.
Cannon AoEs & Volleys

Once a cannon spawns, it will wait ~8.6 seconds before it begins shooting. Once it starts, it will shoot an AoE every ~1.6 seconds. There are eight possible positions the AoE can target; it will choose one of them at random, but will avoid hitting either of the last two positions to be selected.
All active cannons fire their AoEs at roughly the same time, though not exactly. The third cannon shot, and every 13th shot afterwards, is replaced with a volley opportunity. When a volley opportunity occurs, at least one active cannon will fire AoEs at multiple positions at once instead of hitting only one. Multiple cannons can take advantage of an opportunity at once, but some may shoot only a single AoE like normal instead.
There are four cannon volley patterns, described using the positions shown to the right: one that hits positions 1, 2, 3, and 5; one that hits positions 2, 3, 4, and 6; one that hits positions 4, 6, 7, and 8; and one that hits all 8 positions.


Solution:
Ideally avoid standing on the same side of the arena as an active cannon. If you have no choice, the AoEs each take ~3 seconds to activate and can be easily sidestepped.
The safest place to stand while on the same side as an active cannon is right next to Sabetha, since only a single AoE position can reach you there and only 2/4 volleys hit the 1st position.
Time Bombs
At the start of the fight and each time Sabetha returns to the platform, she will mark the closest player with a Time Bomb. It is a large spread AoE which deals heavy damage to all players in its area except the player it’s applied to, including to downed players. They cannot be dodged, but they can be blocked. Additional Time Bombs will be applied every 15 seconds, except during Firestorm.
The Time Bomb’s application is indicated by a ping sound cue followed by a hissing sound that lasts until the bomb explodes. You will also receive a chat message and a broadcast in red that both read “Timed Bomb!”, and an icon depicting a bomb will appear above your head.
Solution:
If you get targeted with a Time Bomb, move off of the group as fast as possible. Be careful not to run into your flak kiter and kill them.
Listen for the sound cue rather than watching for the AoE indicator, as it appears at a slight delay and doesn’t immediately tell you who in a stack of players has the bomb. The cooldown between Time Bombs is exactly half the time between cannon spawns, so you can use those as a frame of reference for when to watch out for spreads.
The very first Time Bomb at the start of the encounter can be easily baited by whoever enters the arena first. This is usually done by the flak kiter. You can also bait Time Bombs throughout the fight by stepping into Sabetha’s hitbox to be the closest player.
Firestorm
30 seconds into the fight (when the first cannon spawns), Sabetha will target a random player with Firestorm, often referred to as the flamewall. Afterwards, she’ll use this mechanic again every 45 seconds. If she isn’t on the platform when the 45-second timer expires, she’ll use it immediately upon returning; the 45-second timer then begins again, starting from the moment she returned.
When Firestorm is activated, Sabetha aims an arrow indicator at a random player. ~3 seconds later, the flamewall ignites and begins slowly rotating counterclockwise. It takes 10 seconds for the wall to complete a full rotation. It extends all the way to the edge of the arena, and can also hit players that are gliding above it. Any player who touches the wall is instantly killed.
Trivia:
It’s actually possible to pass through the flamewall without dying. This is incredibly inconsistent to pull off, since it relies on the fact that the wall only checks if it’s colliding with players at specific intervals around the circle. These intervals are very close together, but it’s possible to sneak through if you’re very fast and very lucky.
Solution:
When the arrow indicator appears, step over it to the left. Wait a second for the wall to move, then step right past the location where it started. This avoids the wall with minimal movement.
If you’re caught with an active flamewall to your left, quickly rotate counterclockwise ahead of it. Standing closer to Sabetha as you do so will allow you to outrun the wall thanks to the laws of geometry. You can also use a blink to safely teleport to the other side of an approaching wall.
Be careful with gap closers during Firestorm. Even if you’re on the opposite side of here, these can sometimes pull you into her hitbox and cause you to clip the firewall.
Flak Shot
As the third hit of her auto-attack chain, Sabetha will use Flak Shot to create several fiery AoEs around the furthest player from her’s feet. This mechanic is generally handled by a designated flak kiter; see the above section on special roles for more information.
Solution:
Don’t step into the flak AoEs. Ensure you don’t step further away from the boss than your flak kiter, or else you may take heavy damage and/or place flak in an inopportune location.
Players running out to launchpads to deal with cannons may often get targeted with flak, especially if they wait there for a long time. If you arrive at your launchpad early, avoid standing directly on it so that it doesn’t get covered in flak.
Phases & Additional Mechanics
The encounter begins when a player steps onto the last third of the bridge leading down to Sabetha’s platform. The bridge will be destroyed and kill any players still on it after a few seconds, so make sure everyone is ready to enter before moving too close.
Phase 1
This phase lasts from 100-75%. All core mechanics are active during this phase.
After the first Time Bomb, Sabetha will immediately use Flak Shot. Make sure your flak kiter is ready to deal with this immediately.
When the boss phases, she will teleport away to the cannon platforms and become invulnerable.
Kernan
The first of Sabetha’s mini-bosses, Kernan, will appear in the center of the arena. She can chase players around the platform and will periodically use Hail of Bullets. This phase lasts for up to a minute, or until Kernan reaches 25% HP. Either way, Sabetha will return to the platform and begin phase 2 while Kernan is still present; players will need to finish her off while dealing with Sabetha’s attacks as well.
Hail of Bullets
Kernan fires off three consecutive cone AoEs in front of her. Each grows larger in size and deals more damage than the last.
Solution:
The cones are fired in the same direction, so the 2nd and 3rd hits can be easily sidestepped once you see the first cone. This attack is also relatively easy to outheal.
Heavy Bombs
During this and the other mini-boss phases, Sabetha will periodically toss a Heavy Bomb down onto the platform in a random position. After ~3 seconds, the bomb will explode, dealing heavy damage to the platform (20% of its HP) and knocking back nearby players.
The bomb can be defused by interacting with it. This animation benefits from quickness.
Solution:
Watch out for Heavy Bombs during each of the mini-boss phases. If you see one, run over and interact with it as soon as possible. Some groups will relegate this task to their healers.
Phase 2
This phase lasts from 75-50%. It is mechanically identical to phase 1, except that Kernan will still be present for the first portion of it.
When the boss phases, she will once again teleport away to the cannon platforms and become invulnerable.
“Knuckles”
The second of Sabetha’s mini-bosses, “Knuckles”, will appear in the center of the arena. He can chase players around the platform. Heavy Bombs will once again be active during this phase. Like Kernan, this phase lasts for up to a minute, or until “Knuckles” reaches 25% HP. Either way, Sabetha will return to the platform and begin phase 3 while “Knuckles” is still present; players will need to finish him off while dealing with Sabetha’s attacks as well.
Platform Quake
After ~2.5 seconds, “Knuckles” will gain a defiance bar. If he is not CC’d quickly, he will toss all players up into the air, then outwards. This can throw players off the platform, instantly killing them. If he is CC’d successfully, this skill goes on cooldown for 15 seconds.
Solution:
Watch carefully for his defiance bar and CC him as quickly as you can.
If he performs Platform Quake, stand as close to the center as possible to improve your odds of surviving. You can also attempt to deploy your glider to save yourself.
Phase 3
This phase lasts from 50-25%. All mechanics from phases 1 and 2 are active during this phase, and “Knuckles” will still be present for the first portion of it. Additionally, one existing mechanic is ramped.
Time Bomb will now target the two closest players each time it is used. Both bombs hitting the group is likely to down most players, so running them off the stack is even more important than before. When the boss phases, she will once again teleport away to the cannon platforms and become invulnerable.
Karde
The third and final of Sabetha’s mini-bosses, Karde, will appear in the center of the arena. Heavy Bombs will once again be active during this phase. Like Kernan and “Knuckles”, this phase lasts for up to a minute, or until Karde reaches 25% HP. Either way, Sabetha will return to the platform and begin phase 4 while Karde is still present; players will need to finish him off while dealing with Sabetha’s attacks as well.
Karde will occasionally attack with his flamethrower, which deals significant damage. He has more HP than the other mini-bosses, but takes 25% additional damage from conditions.
Flame Turrets
Karde periodically summons Flame Turrets in random locations around the arena. These fire a spread of eight fire projectiles in a circle around them every 3 seconds, and they remain active for the rest of the fight unless they are killed.
Solution:
Use piercing projectiles or AoEs to take out turrets while still focusing on Karde if possible. If your squad doesn’t have those available, or the turrets are taking too long to die, run out and kill them.
The turrets’ projectiles move in straight lines and always fire in the same directions. If you find a safe spot, it will remain safe from the turret indefinitely. The further away you are from the turrets, the more room you have to avoid their projectiles.
Phase 4
This phase lasts from 25-0%. All mechanics from phase 3 are active during this phase, and Karde will still be present for the first portion of it. One additional mechanic is introduced.
Platform Crush
Once Sabetha returns to the platform for the final phase, Platform Crush will activate. For the rest of the fight, small AoEs will appear rapidly in random locations across the arena. These deal low damage to any players they hit.
Common Misconception:
Many believe that this mechanic serves as a “soft enrage” that will start slowly killing the platform once you enter phase 4, but this isn’t actually true. Despite the name, Platform Crush does not deal any damage whatsoever to the platform.
Solution:
The AoEs from Platform Crush don’t do much damage and can be easily outhealed so long as you aren’t also being hit by more dangerous mechanics, such as active cannons or Karde’s Flame Turrets.
The greatest danger posed by this mechanic is that the many AoEs and the falling debris animations make the screen much more chaotic, and make some ground indicators harder to see. Remain focused and prioritize other mechanics and staying stacked with your squad over trying to avoid Platform Crush AoEs.
Enrage
The boss’s enrage timer is 9 minutes. When the timer expires, she gains a 500% increase to her outgoing damage and all four cannons immediately become active.
Strategies
Cannon Rotation
The most common strategy is for the group to start south of Sabetha and move each time a player is launched to a cannon so that they will always be between Sabetha and the next cannon. The squad will usually stack tightly with the flak kiter behind them, and may try to bait the flamewall to either the left or the right of the next cannon.
- Left: The flamewall will pass over the launchpad immediately, meaning the cannon player will need to avoid the wall first before moving to the launchpad to get launched. However, the flamewall will not reach the launchpad again as it finishes its rotation, meaning the cannon player can glide back down immediately.
- Right: The flamewall will take its entire rotation to reach the launchpad, meaning the cannon player can go up immediately without worrying about the wall. However, the wall will likely be passing over the launchpad as they finish killing the cannon, potentially forcing them to wait before gliding down.
Pros:
- Puts cannon players very close to where they need to go.
- Gives the rest of the squad very clear and consistent directions on where to aim Sapper Bombs, as the cannon will always be directly behind them.
Cons:
- Will require a player to track the next cannon in the pattern. Things can start to go wrong very quickly if they make a mistake.
- The squad can be hit by the first few cannon AoEs before the cannon player is launched up and kills it, adding a bit of damage pressure.
- Requires lots of movement, though only in short bursts.
Single-Cannon Strat
An alternative strategy is to select only one cannon to kill and ignore the others. The group will stack between Sabetha and that cannon, like the above strat, but will ignore the other three cannons. Due to only killing one cannon, only one player needs to be designated to that role. There are several viable cannons to stand at:
- East is the 4th and 8th cannon in the rotation, meaning its the easiest to skip the second spawn, either by killing Sabetha so fast it never spawns or by just tanking the last few seconds of the fight in cannon AoEs. If you have a sapper baiter, this position makes their job very annoying and is likely to result in someone else getting the Sapper Bomb, resulting in a slight DPS loss as whoever gets it throws it to the launchpad.
- West is the 2nd and 7th cannon in the rotation. If you want to have the best chance of only killing one cannon without the janky positioning for sapper baiting at east, this is the best position for you.
- North is the 3rd and 6th cannon in the rotation. Its virtues are similar to west’s, with the first cannon being delayed further in exchange for the second cannon occurring sooner.
- South is the 1st and 4th cannon in the rotation. It is the one you will need to kill the soonest in both cases, and groups with less DPS may even need to kill it three times as opposed to a maximum of twice at other positions. Don’t do this strat at south.
Pros:
- Requires much less movement, and significantly improves the squad’s DPS as a result.
- Makes the job of your flak kiter and/or sapper kiter much easier, since the squad will always be standing in the same place.
- Only requires one cannon player instead of two, further increasing the squad’s DPS.
Cons:
- Since three cannons will be left alive throughout the entire fight, the platform is constantly taking damage. This strategy strictly requires high enough DPS to kill Sabetha before the platform is destroyed.
- Leaves the squad with very little space to evacuate to if the flak kiter messes up and a Flak Shot hits the stack.
- The constant cannon AoEs on the other sides make it more dangerous to leave the stack to deal with certain mechanics, such as Heavy Bombs or Karde’s Flame Turrets.
Achievements
Backdraft Dodger
Avoid getting hit by Firestorm, and then defeat Sabetha.
Survive to the end of the encounter. Firestorm will always instantly kill anyone it hits, so if you’re alive, you’ll get this one. Note that dying to other mechanics also denies you this achievement.
Last Cannon
Leave one cannon operational for the entire fight, and then defeat Sabetha.
Pick one of the cannons and go the entire fight without killing it. As you can see above, leaving three cannons operational is an actual strategy that makes the fight faster; if you can find a group running that strategy, you’ll earn this achievement for free.
Otherwise, if trying to earn this achievement with a group running the typical strategy, leave the east cannon alive, as it is the last to spawn and will therefore deal the least overall damage to the platform. Simply avoid standing in that quarter of the arena and you should be fine.
Alternative Guides
Don’t jive with the way the information is presented here? Here are some alternatives:
Leave a Reply